|
Index Project |
This page is an information page for those helping in the reading and indexing of the Grand Rapids Cemeteries - initially the Saints Peter & Paul Cemetery. If you want to help with this project, send me an eMail.
For this project we are using a "stand alone" database prepared in FileMaker Pro for the data input. This will help with more consistent data entry, making checking and compiling easier, and since so many of the entries are nearly identical to the previous entry on the page, the software automatically enters the same data from the previous record, so you only need to type the information that is different to add each new record. The screen you will use is shown below.
The software for both Macintosh Mac OS X 10.3 and higher, and Windows 2000/XP/Vista/7 users can be downloaded from the links below.
The software is downloaded as a ".zip" file that will expand on both Windows and Macintosh computers.
Windows Users
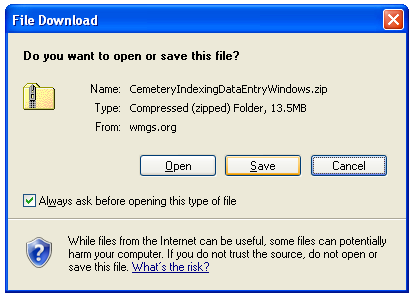
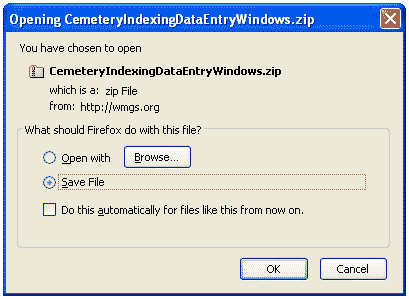
These screen shots might help Windows users with this process. After you click the link to download the file you might see a window like one of these...
After you click Save or OK, choose where you want to save the file - the Desktop is probably a good place so you know where to find it afterwards. Firefox puts it in your Downloads folder.
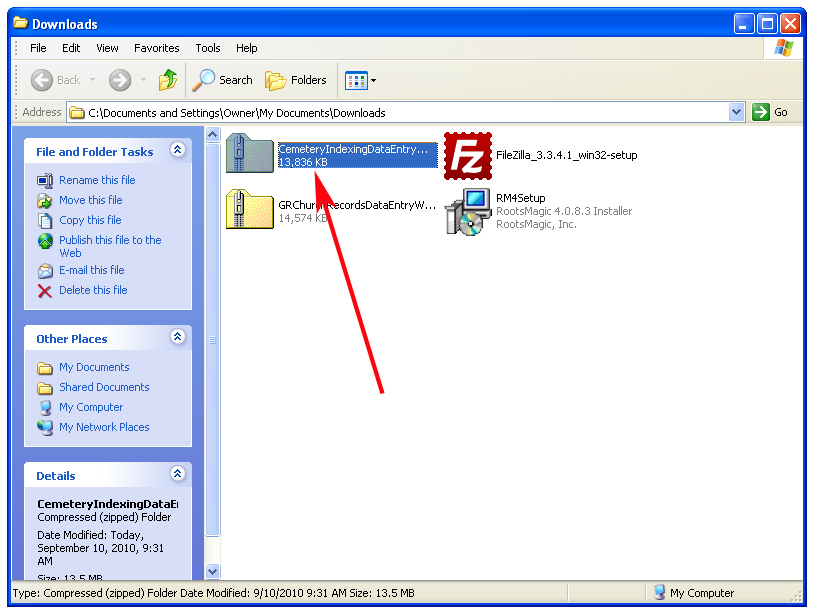
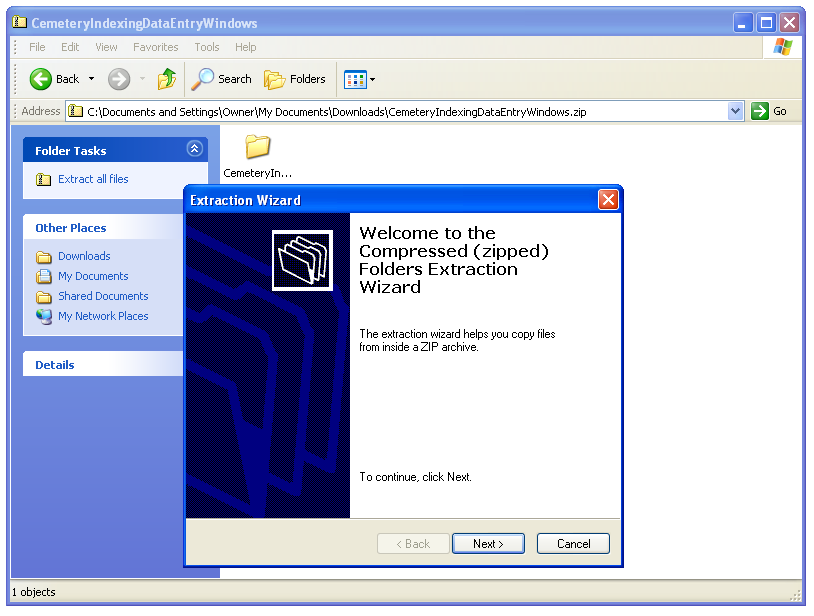
Once the download has completed, find the file where you saved it to, or where your downloads are normally saved to, and double click the file CemeteryIndexingDataEntryWindows.zip. (Note that the downloaded file might open automatically when the download is complete. It should open a window similar to this one
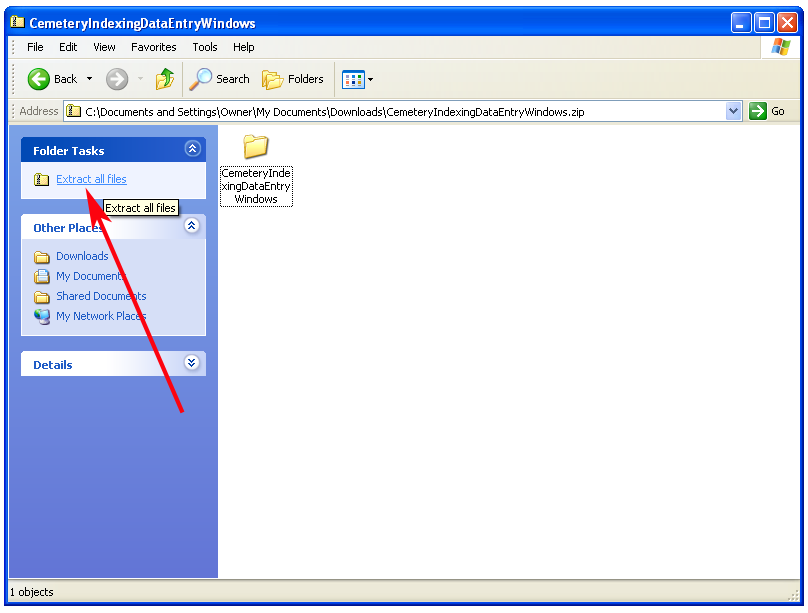
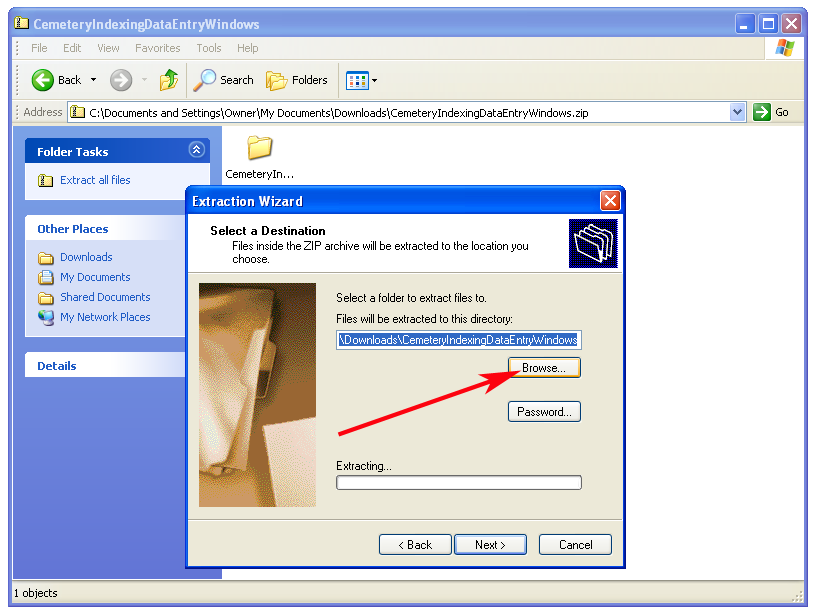
and once open click the link for "Extract All Files". This will open the Wizard
which will walk you through extracting and saving the files. Make sure you know where you are extracting the files to, so you can get back to it. The Desktop is probably a good place.
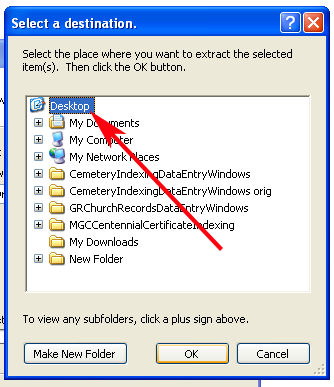
Click the Browse button and then choose Desktop from the left
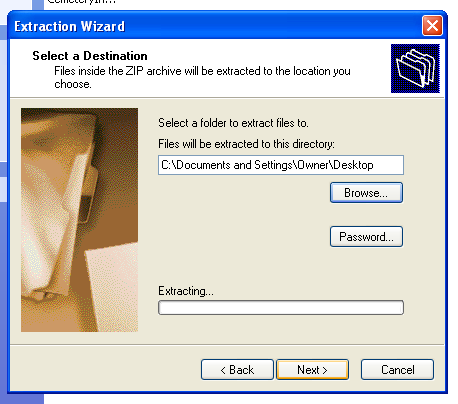
once that is chosen click Next
and when that has is done click Finish.
When you have extracted the files, DELETE the .zip file you downloaded - it is the one with this icon -
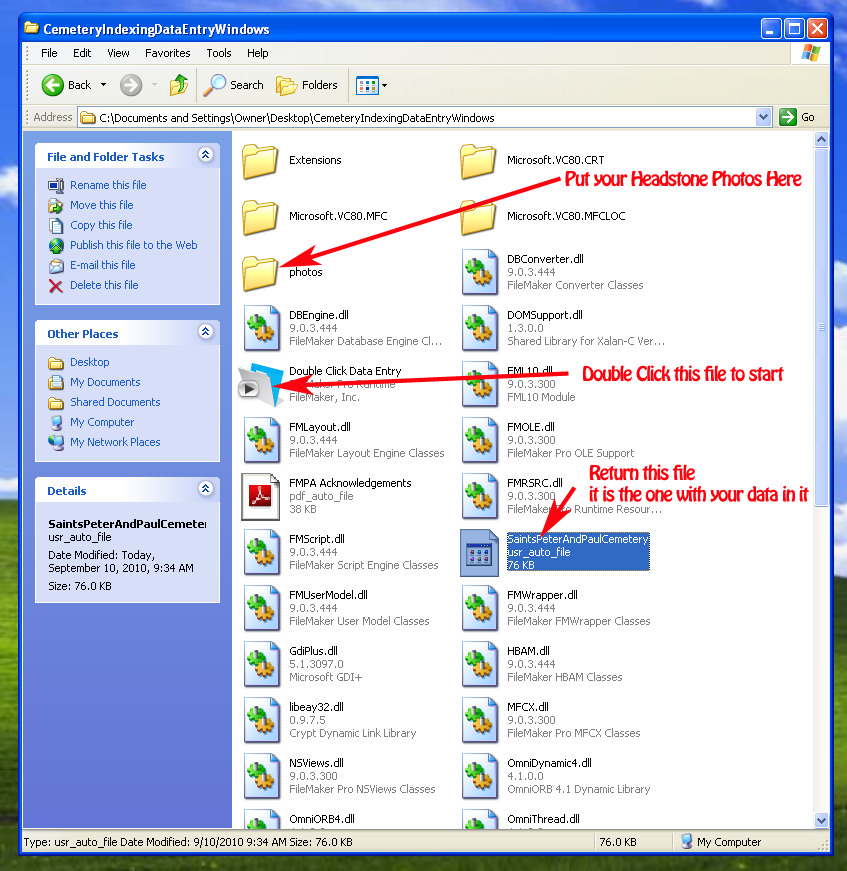
(note the zipper on the icon of the folder) - this will avoid confusion about having similar items on your computer, and possibly entering data into more than 1 instance of this database. When you are finished you should have a SINGLE folder called CemeteryIndexingDataEntryWindows on your Desktop. Make sure you know where it is. When you open it you see the screen shown below
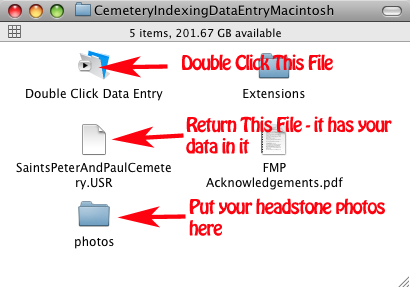
To open the database ready for data entry double click the file indicated by the red arrow in the screen shot above. The screen shown below will appear.

Prior to starting, if you took photos of the headstone, place them, or a copy of them into the photos folder. This allows the database to create the link needed between the record in the databae and the image file.
To open the database ready for data entry, double click the file called "Double Click for Data Entry". Do NOT double click the file called SaintsPeterAndPaulCemetery. If you double click the file called SaintsPeterAndPaulCemetery, you will get a dialog asking you to choose a program to associate with .usr files, and once "Double Click Data Entry" is chosen, future database projects will also try to run in this, which won't necessarily be correct.
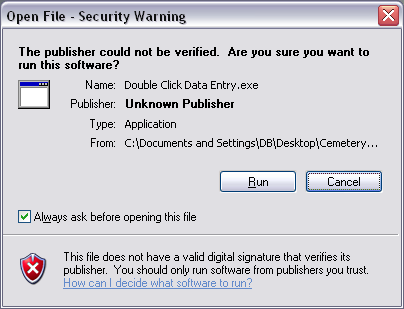
You might get a Security Warning similar to the screens below. You can safely click the Run button.
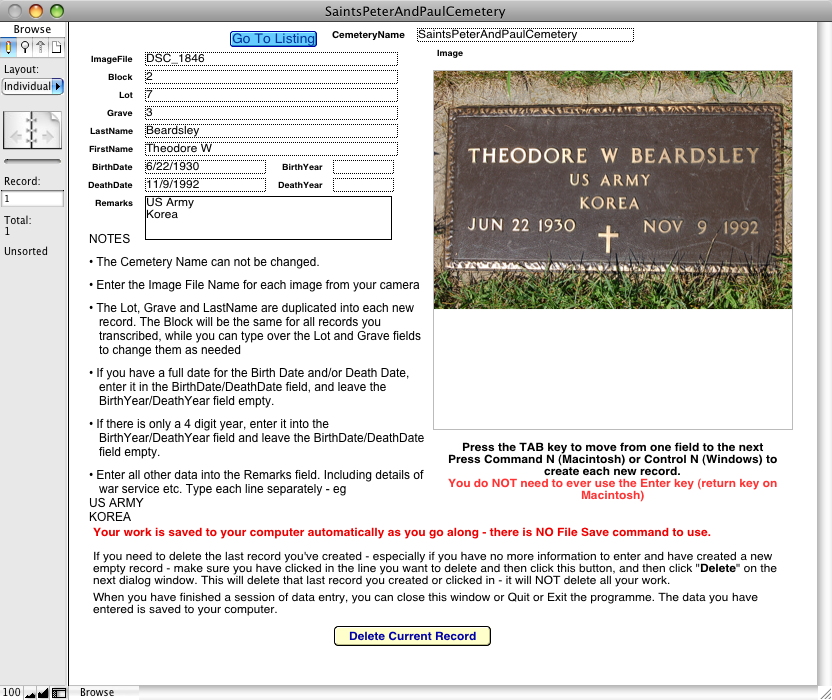
Data Entry Screen
The Windows screen is similar to this.
Note the instructions on the screen.
- Press Command N (Macintosh) or Control N (Windows) to create the first empty record to type into
- Enter the file name of the digital image for each record - you do NOT need to enter the extension - in the example above it's DSC_1846. Fill in the other fields that you have information for. When this record is complete, press Command N (Control N on a Windows computer) to create the next record.
- This record will be "prefilled" with the values from the previous record for the Block, Lot, Grave and Last Name fields. Type over entries that are different, or use the Tab key to move to the field you need to change if some fields are the same.
- When you have entered the first few records, Quit or Exit the programme, then re-open it to make sure that the work you have just done is saved and visible on the screen. If it is, carry on - if it is not you need to revisit the instructions above about extracting all the files from the .zip file to a new folder and then deleting the .zip file, and knowing where it is you saved the extracted files to.
- When you're comfortalbe that your work is being saved - Repeat until done.
- At the end, do not create a new empty record, or you will be unable to close the file. If this does happen, click on that last empty record and then click the button called "Delete Current Record" to delete the empty record you've created.
When you have finished your indexing:
For both Macintosh and Windows users, the data you enter is stored in the file called "SaintsPeterAndPaulCemetery.usr". This is the file that must be returned to me (preferably by eMail) when you are done indexing.
NOTE!!!!!! do NOT send me the file called "CemeteryIndexingDataEntryWindows.zip". This is NOT the file with the data in it, but is the file you originally downloaded that expanded to the above window. The file with the data in it is "SaintsPeterAndPaulCemetery" (or "SaintsPeterAndPaulCemetery.USR" if your computer is set to show the extension on the name) from inside the folder shown above . (See above screen shot - Windows or Macintosh).
To attach the file to an eMail on Windows you can:
Macintosh users can use methods 2 and 3 above.
Use the appropriate link here to download the file:
Macintosh users Click Here
Windows users Click Here
If you have any questions about the data entry aspects of this, please contact me by eMail